
 Jade Mcgee
Cacti are not the obvious candidate when you think about seed propagation. Division, cuttings and offsets are quicker, more predictable and less demanding. But seed propagation has advantages that the other methods cannot offer: access to species you will never find at a nursery, complete control over the plant’s environment and growing history from germination onwards, and the particular satisfaction of watching something that started as a point of light in dark soil become a recognisable plant over months and years.
Growing cacti from seed is not technically difficult. It is demanding in terms of consistency and patience, and the consequences of lapses in either are immediate. Done correctly, the results are genuinely rewarding.
Equipment and materials
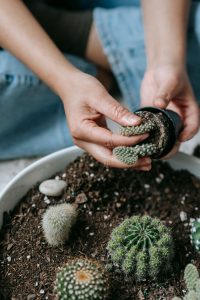
You will need a shallow seed tray or small seedling pots with drainage holes, a gritty seed-starting mix, vermiculite for covering the seeds after sowing, and a clear plastic cover or resealable bag to maintain humidity around the tray. A heating mat is useful in cooler environments, since soil temperature below 20 degrees Celsius significantly slows germination for most cactus species.
The seed-starting mix should be both moisture-retentive enough to sustain germination and free-draining enough to prevent rotting. A blend of standard potting mix and coarse river sand or perlite in roughly equal proportions works well. Avoid using pure potting mix, which holds too much moisture for young cacti, or pure sand, which provides no nutrient support.
Sourcing seeds
If you have a flowering cactus, seeds can be collected from the seed pods that develop after flowering. Pods should be harvested once they have dried and begun to split open naturally, indicating the seeds inside are fully ripe. Collected seed is more variable in germination than purchased seed but has the advantage of being free and immediately available. For greater reliability or rarer species, purchasing from specialist seed suppliers is the more consistent approach. Seeds from reputable sources typically have higher germination rates and come with accurate species identification.
Sowing
Soak seeds in lukewarm water for 12 to 24 hours before sowing. This softens the seed coat and improves germination rates for many species, though it is not strictly necessary for all. Fill the tray to within a centimetre of the rim with your pre-moistened seed mix, then scatter the seeds across the surface as evenly as possible, leaving a few millimetres between seeds to allow room for the developing seedlings.
Cover the seeds with a thin, even layer of dry vermiculite. The layer should be just thick enough to barely obscure the seeds beneath it. Some species germinate better completely uncovered; if you are working with a specific variety and have information about its preferences, follow those guidelines. As a default, light covering works for most commonly available species.
Environment during germination
Place the covered tray inside a clear plastic bag or under a plastic dome to retain humidity. Set it in a warm position with bright indirect light, never in direct sun while the cover is in place, since heat builds rapidly inside a covered container and can kill germinating seedlings. A temperature range of 20 to 30 degrees Celsius is ideal for most species. In a South African context, a warm spot indoors away from windows or on a heat mat works well through the cooler winter months.
Check moisture levels every two to three days. The surface of the mix should stay slightly moist but never saturated. A fine mister is more useful here than a watering can, since gentle, targeted moisture application avoids dislodging seeds or overwatering localised areas.
After germination
Germination timing varies considerably between species and can range from two weeks to several months. Check the tray regularly but resist disturbing it or adjusting conditions if nothing appears to be happening. Some species simply take longer than others. Once germination is clearly underway, begin gradually increasing ventilation by opening the bag or lifting the plastic dome for progressively longer periods each day. This hardening-off process prevents the seedlings from being shocked by lower humidity when the cover is eventually removed entirely.
Once the cover is off, allow the mix to begin drying slightly between mistings. This reduces the risk of damping off, the fungal condition that kills young seedlings at soil level and is the most common cause of failure at this stage. Leave seedlings in their original tray for several months before considering any repotting, since the root systems are extremely fragile at this stage and any premature disturbance risks significant setback.
The realistic timeline
The most important mental preparation for growing cacti from seed is accepting the timeline. Some species will produce seedlings barely two centimetres tall after a full year of growth. This is normal. It is also the point at which the process becomes genuinely compelling: the plants are identifiable as their species, fully adapted to your conditions, and established in a way that a nursery purchase can never quite replicate. The slow game is the point.
ALSO SEE:
Transform your balcony this winter: Four textural plants to try
Featured Image: Pexels
