Tired of your bathroom tiles? You can upgrade your bathroom with pebble tiles – and it’s easier than expected. While removing and replacing tiles usually calls for professional help, pebble tiles are very easy to place and don’t require any grinding or cutting. Here’s a quick guide to inspire you to refresh that tired shower floor:

stylebyemilyhenderson.com
Choosing the tiles
Pebble tiling is sold in sheets connected by mesh, or can be done using pebbles you’ve collected. This sounds like a lot of work, but if you have a very specific vision in mind and frequent the outdoors, you can put together enough relatively flat pebbles to do the job.
Sheets are the easier option, though, and there are many beautiful mixes and colours to choose from. First decide if you’re looking for a clean, white or neutral look like these:
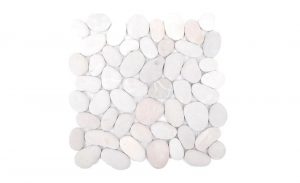
Italtile
Mixed tiles are great for a natural, earthy bathroom with natural tones. These mixed colour sheets can really help pull together different colours already decorating the space, such as these:
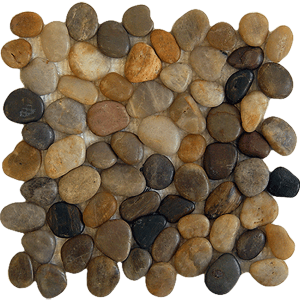
Union tiles
Charcoal is a bold but beautiful choice if it suits your bathroom. This is well suited to well lit spaces with bright fixtures, accents, textiles or other decor to offset the deep tones of pebble tiles like these:
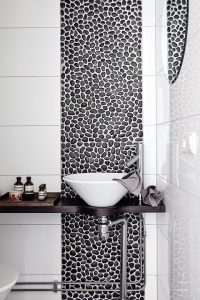
delikatissen.com
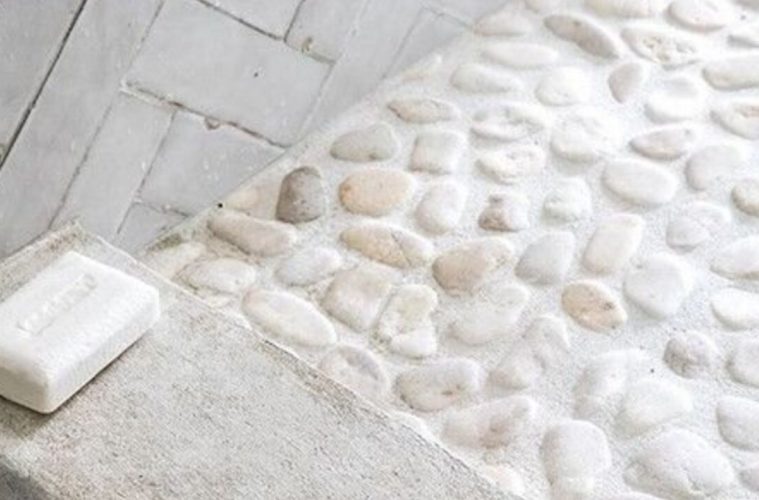
Preparing the floor
Prepping your bathroom wall or floor for new tiles is the most labour-intensive part of this problem. As our resident DIY-er says, “it’s not so bad, you just end up with a sore back.” You can tile over the current tiles, or remove them first.
Removing tiles involves nothing but a hammer, chisel, safety goggles, and channeling your stress into smacking away at those pesky, dated tiles. If you don’t mind your new pebble tiles being a few centimeters higher, though, you can just tile over the old ones.
Once you’ve removed the old ones or decided to just layer pebbles on top, clean the surface thoroughly. You can use any all-purpose cleaner that will get rid of glue, dust and other unwanted elements that could make your new tiling uneven.
Next, do a dry layout of your pebbles or pebble sheets. This is important to do before you actually starting sticking anything down, because you need to plan how the pebbles and sheets are going to fit around things like corners, curves and drains.
Laying cement or mortar
After this step, you can lay down your tile cement or thin-set mortar. You can use the flat side of your trowel to key into thin-set mortar. Then, you should comb it with the trowel’s notched side in even, horizontal lines. You’re aiming for even application of cement or mortar, so the tile can hold onto it. Even, horizontal lines make it easier for the tiles to grip onto the surface. This way, they’ll stick better.
Remember to only put down the amount of cement or mortar you can tile over in 10 minutes. Otherwise, the mixture will start to harden before you’ve put any pebbles onto it.
Placing the tiles
There are two ways to place your tiles. First, you can do what the Tiktoker below does: place whole sheets in as much space as possible, then break up extra sheets into individual pebbles and manually place these one by one to fill the gaps between sheets. This will save you time and create a seamless look.
@e.tile Don’t waste your time. This works just fine 👍🏻 #tile #tiling #howto #protip #diy #fyp #tip #trick #pebbles
Second, you can break all pebbles off their sheets and place them one by one. This gives you more freedom, and is great for tricky shapes, curves and spaces. It also looks more natural, as you can see in the TikTok below:
@obftile Shower floor pebble action #tileguy #tilelife #tile #construction #fyp #yourpage #foryou #diy #tutorial #businessowner #remodel #tips #austintx
Lastly, you can collect your own pebbles! This might take a while, but can end up looking incredible. These don’t need a dry layout as much as the sheets do but make sure you have enough of them to cover the space before you lay down any cement or mortar.
Grout
Grouting is as straightforward as it is messy. Make sure you’ve selected your desired colour (instead of accidentally grouting with black instead of white, for example, because that’s tricky to fix). Then simply lay it down, spread evenly, finish with a sponge or cloth, and let sit as this Tiktoker below has done:
@homerepairtutor How to grout shower floors 👍🏼🔥#tilegrout #showerremodel #bathroomremodel #homerepairtutor
If you give your bathroom a pebble makeover, show us on Instagram at @sagardenandhome or Facebook at @SA Garden and Home Magazine!
SEE MORE: Spring has sprung and your home needs these trends!
SEE MORE: How to paint concrete floors