
September is the start of houseplant repotting season. Whether your collection consists of one plant or plenty, we’ll give you the lowdown on when and how to repot this spring.
Spring is the season of new growth, of rebirth and rejuvenation. However, it may be difficult for your houseplants to participate in the season’s festivities if they’ve been stuck in the same pot for three years running. Just as we get the itch to update our living spaces and revitalise our homes with the annual spring clean, our plants itch for a change in scenery too. Only, their itch is far more drastic than our own, as their long-term survival depends on it. Whether it be poor soil quality, root-bounding, or lack of growth, all houseplants will need to be repotted at some point. Spring is the ideal time to take advantage of peak houseplant growing season, ensuring any potential shock or damage from repotting is quickly overcome, so that your plants can look bigger and be stronger than ever.
Are Your Plants Ready To Be Repotted?
To repot, or not to repot – that is the question. There are some gardeners who say most indoor plants do not need to be repotted at all, others believe it is vital to repot at least once a year, and some overzealous gardeners will repot the second they take the plant home. But repotting a plant at the wrong time or in the wrong way can sometimes have an unfortunate consequence – transplant shock. Plants that experience transplant shock will wilt, their leaves will yellow, and they may struggle to regain their pre-repotting growth, negating the point of repotting altogether.
You should only repot when absolutely necessary, but it may be hard for beginner gardeners to tell when that is.
There are a few cues to indicate if a plant is outgrowing its pot: visible roots above the soil line or from the drainage holes, or roots circling the bottom of the pot. You may also need to repot if the soil conditions are not right. With frequent watering, the soil in containers slowly leeches the nutrients essential for plant health and strong growth. The soil structure can become poor, disintegrating or compacting so that it no longer holds water.
Find a new pot
The first step to repotting is acquiring a new pot. Some gardeners make the mistake of equating a bigger pot with greater growth, choosing a new pot size larger than what the plant is currently in. Unfortunately, this ends up doing more harm than good. It’s best to choose a pot just one or two sizes up. If you’re only repotting to improve soil conditions and the plant hasn’t outgrown the pot, simply replace the soil and keep the plant in the same pot. After size, there is no characteristic more important in a new pot than adequate drainage. If you fancy a pot without drainage holes, simply drill a few in the bottom of the pot or use as a decorative cover pot.
Make a soil mix
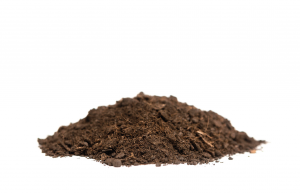
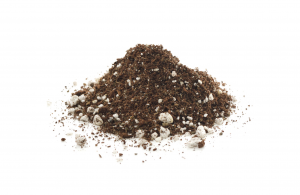
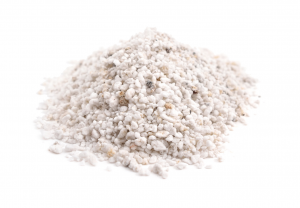
Houseplant potting soil is a special mix of airy materials designed to drain all excess moisture out of the pot, while holding enough moisture needed for plant survival. As your plant is used to this combination of materials, switching them can have disastrous consequences. Instead of using any old potting mix (or worse, soil straight from the garden), make your own houseplant soil mix:
- 2-part potting soil
- 2-parts coconut coir or palm peat for aeration and water retention
- 1-part perlite for aeration
Remove the plant
Armed with soil mix and a new pot, you’re ready to get started. Loosen the plant by gently squeezing the sides of the pot. If the plant is not coming loose, circle a knife around the inside edge. Turn the plant on its side and slowly pull it out of the pot, taking care not to damage the roots or stem as you pull. Once the plant is released, gently loosen the roots and shake off any poor-quality soil. Use this time to examine the roots for any signs of damage, such as root rot. Trim off any areas of concern with a sharp, clean knife, ensuring you remove as little as possible while maintaining good root health.
Replant & Repot
Cover the bottom of the pot with landscaping fabric or an unused coffee filter to prevent soil from spilling out the drainage holes. Fill the bottom 1/3 of the pot with your soil mixture and place the plant inside. Fill the remaining gaps around the pot with soil mix, stopping a few centimetres below the rim to avoid overfilling. Compact the soil gently as you go, either with your hands or with the back of a trowel, to prevent air pockets from forming. Once the pot is filled, use your hands to gently compact the soil around the stem to anchor the plant in place.
Water
Finally, gently water the plant to encourage the roots to spread outwards. This is the ideal time to feed with a water-soluble fertiliser to give your plant a head start on spring growth. Once the excess water has drained
out the pot, return it to its previous spot and watch it grow, happy in its new home.
ALSO SEE 5 TIPS FOR GROWING VEGETABLES