After making several batches of air dry clay fridge magnets – for home, and as gifts for a few loved ones – I am committed to the craft and would love to share a simple guide on how to do so with you. It’s so much fun, and it’s an affordable project to get stuck into.
Here’s how to make your own air-dry clay fridge magnets!
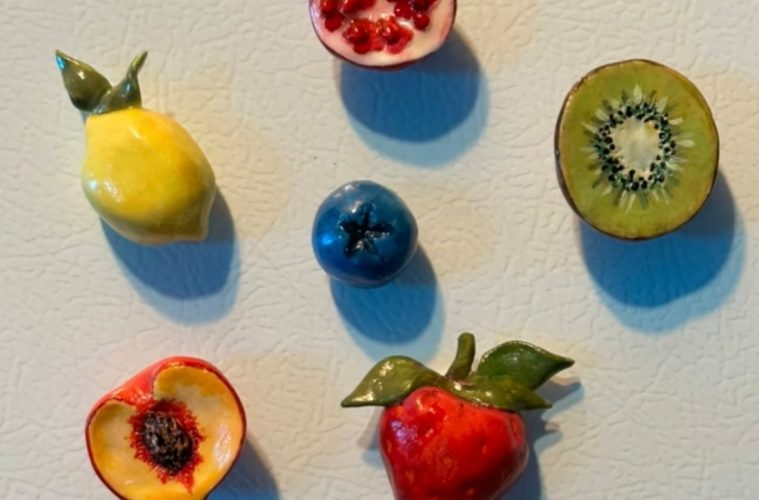
Make your own fridge magnets
I love this project for its versatility. It gives you the freedom to fashion all kinds of cute shapes and forms out of a tiny block of clay. Whether it’s miniature foods, animals, or florals – let your creativity run wild. I like hand drawing my shapes into a flat sheet of clay, cutting them loose, and then shaping them to detail.
Here’s what you’ll need to get started:
What you need
- Air dry clay (Find at Westpack, PNA, or online from Takealot)
- Rolling pin (if you don’t have a pin, use a pencil, or a straight glass).
- Knife or Stanley knife
- Toothpick or sculpting tools
- Acrylic paint or markers
- Paintbrushes
- Magnet strips or round magnets
- Parchment paper or a non-stick surface
- Water (for smoothing clay)
Tik Tok / Emma Kriddle
1. Prep your crafty corner
Find a flat space to work from, and cover your work area with parchment paper or a non-stick surface to prevent the clay from sticking. I use masking tape to stick my parchment paper down to avoid movement or scrunching.
2. Prep your clay
Gauge how much clay you’ll need depending on how many magnets you would like to make. I would recommend starting with a smaller batch (3-5 ornaments). It’s always a good idea to keep your first batch to a minimum to iron out any learning curves. Once you’ve got the hang of it, your second batch could be bigger.
Once you’ve determined how much clay you’ll need, knead in your hands to soften it. Once it starts to soften up and is malleable, roll the clay into a ball.
3. Roll into a sheet
Use a rolling pin to flatten the clay into a sheet of your desired thickness. Aim for around 10mm.
4. Cut your shapes out
Use a knife or Stanley knife to cut out shapes from the flattened clay. You can make any shape you like including simple forms like stars, moons, hearts, animals – any design you prefer! Just ensure that your shapes are of a suitable size for magnets.
5. Add texture and detail
Use sculpting tools, a toothpick, or simply your hands to add some texture and detail to your shapes. You can make imprints or hatch with a toothpick. For this to work, you’ll need to ensure that your clay is not too thin, especially where the magnet will be attached.
6. Let them dry
Place your little works of art on a flat surface away from direct sunlight. Let them air dry as per the instructions on the clay’s packaging. Typically, air dry clay takes around 24-48 hours to completely dry, but it can vary based on thickness and brand.
7. Time to give her some personality
Once your shapes are completely dry, use acrylic paints or markers to decorate them. Let your creativity flow! You can paint intricate designs, add patterns, or write messages. If you’d like to keep your magnets sweet and simple, stick to a smaller neutral colour palette, if you want fridge magnets that pop, use bolder colours.
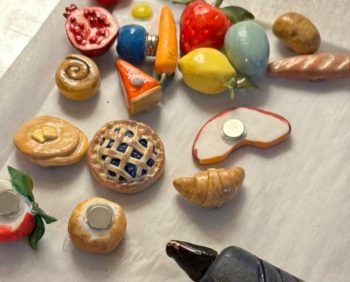
8. Attach the magnets
When the paint is dry, use strong glue (such as super glue) to attach magnet strips or round magnets to the back of the clay shapes. Ensure the magnets are securely attached and let the glue dry completely before handling again.
9. Finishing touches
Seal the clay with a clear varnish or Mod Podge after painting for extra protection and a glossy finish. Once they’re dry, they’re ready to meet your refrigerator!
Make your own adorable succulent fridge magnets with real plants
The article was originally written and published by Savanah Douglas for Woman&Home.
Feature image:Tik Tok / Emma Kriddle