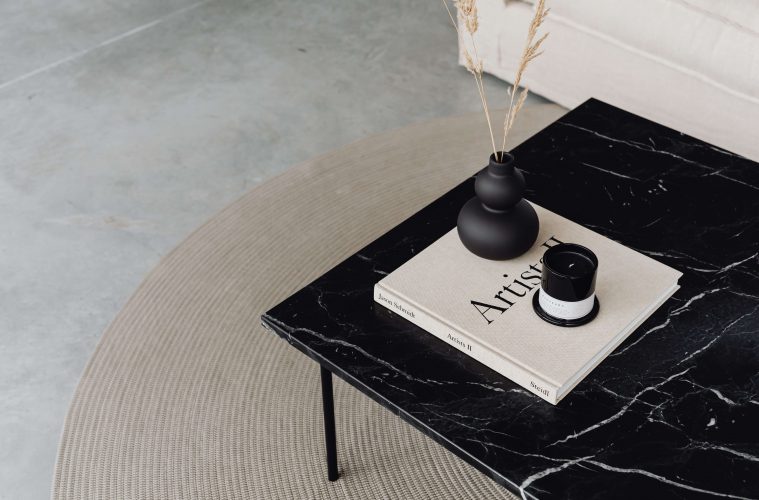
The marble pattern has been a firm favourite of mine for many years. Faux or real, the swirls, blends and mix of colours add interest in a space and give that lux feel.
What better way to easily DIY that marble look for less and have creative fun while mixing up and pouring paint?
With Plascon’s new range of water-based, super gloss, scratch-resistant enamel paint, this is the perfect product for a DIY project to resurface side tables.
View this post on Instagram
Tools and materials needed:
- Paintbrush and drop sheets
- Scraper and refuse bags
- Workstation table
- Small jug of water to dilute the paint (Plascon range of water-based enamel paint)
- Stirrer
- 1+1 litre white water-based enamel paint
- 1+1 litre black water-based enamel paint
- Plastic cups and plastic sauce bottles
- Side tables or small table surfaces of your choice
Method:
Step 1: Decant the paint
The base colour for the black marble is black and the drizzle colour is white. Decant some black water-based enamel paint into a plastic cup (about 1/3) then add some water (1:1 ratio). Mix the paint well until it has a good fluid consistency.
Add some white paint into a sauce bottle or something that has a nozzle so that you can drizzle the paint. Add 1/3 of the paint to that container and dilute with water (1:1 ratio). Put the lid back on that container and mix the paint well.
Pro tip: Diluting the paint for more fluid consistency is key. Not too thin and too thick. More fluid means more blends. It helps the paint glide and mix well to create the swirls.
Step 2: Pour the base colour
Pour the base colour onto the surface of the round table surface and try to cover as much surface area as you can in one pour of the cup, from the centre to the outer edges.
As you have poured out all the paint, put the empty cup down and then carefully life the table surface and slightly tilt from side to side to spread the diluted paint. The fluid-diluted paint will move and cover the surface top and slightly drip over the edges.
Step 3: Drizzle a secondary layer of paint
Once you are happy with the spreading of the black base colour coverage on your tabletop surface, grab the secondary colour in a squeeze bottle and sporadically drizzle the diluted white paint over the black base that you have just poured. Both paints must be wet and fluid to blend well.
Have fun and be creative. There is no right way to sporadically drizzle the white paint. Do what you feel looks good to your eye.
Using two hands, carefully lift the table surface and slightly tilt from side to side to spread the diluted white paint into the black base paint. The two thinner diluted paints will move and mix, creating blends, lines and swirls like a faux marble pattern.
Step 4: Set aside for drying time
Gently tilt the surface until you are happy with the way the pattern is looking and then set it aside somewhere over a drop sheet, where there will be no disturbances so that the paint can fully dry and set over the next 24 to 48 hours.
ALSO SEE:
By Elle Franco
Feature image: Pexels
A version of this article appeared in the April 2023 print issue of Garden&Home.