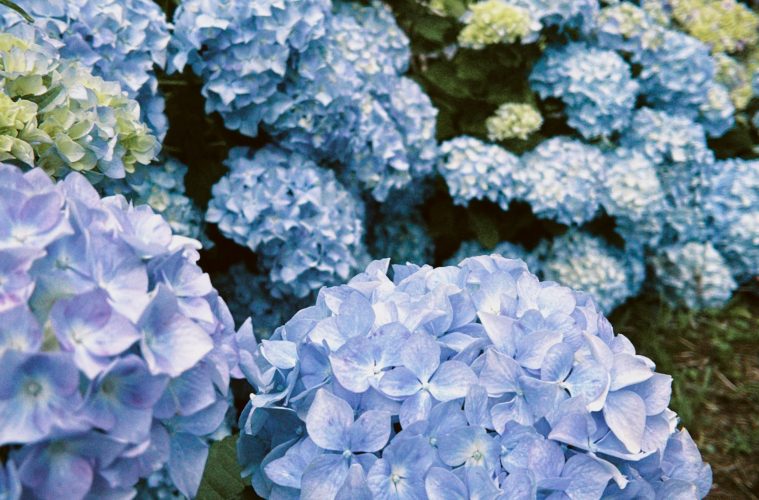
Hydrangeas are among the most generous garden shrubs, and their generosity extends to propagation. A single established plant can produce multiple offspring through stem cuttings, ground layering or division, each method suited to different situations and producing different results. For anyone who wants more of a favourite variety without the cost of buying new plants, it is one of the more rewarding skills to develop.
Propagation is not limited to spring. Cuttings taken in early to mid autumn, while the plant is still in active growth, root well and can be overwintered indoors to plant out the following spring. Ground layering can be established in autumn and left to develop roots over winter. Division works best done at least four weeks before a hard frost, giving new transplants time to settle before the ground freezes, or alternatively during full dormancy when the plant is least active.
Taking stem cuttings
Cuttings are the most productive method because a single plant can yield many of them, and the process produces plants genetically identical to the parent. This makes it particularly useful when you want to replicate a specific flower colour or growth habit.
Look for healthy stems that did not flower in the current season and show flexible, pliable growth rather than fully woody material. Cut a section ten to fifteen centimetres long, trimming just below a leaf node. Remove the foliage from the lower half of the cutting, keeping one or two leaves at the top. If these upper leaves are large, cutting them in half reduces moisture loss through the cutting while it is establishing.
Dipping the cut end in rooting hormone powder gives the process a useful boost, though it is not strictly necessary as hydrangeas root relatively readily. Plant the cutting in moist, free-draining potting mix so that at least two leaf nodes are buried beneath the surface. Keep the pot in a bright position out of direct sunlight, and maintain consistent moisture without waterlogging. Rooting typically takes two to four weeks: the cutting is ready to move on when it resists a gentle upward tug. Once rooted, transfer to a slightly larger pot and continue growing under protection until spring, when it can be hardened off gradually and planted outdoors.
Ground layering
Ground layering is the simplest of the three methods and produces large, well-established plants with minimal effort. It works by encouraging a low-growing branch to root while still attached to the parent, which means the new plant draws on the parent’s resources while it establishes, rather than having to sustain itself from a cutting alone.
Choose a long, flexible stem with healthy growth that can be bent to reach the ground without snapping. Identify a section of around fifteen centimetres where the stem can make good contact with the soil, and remove any leaves from this portion. Lightly scratch or nick the underside of the stem at this point, which encourages rooting, and optionally apply a small amount of rooting hormone to the scarred area. Dig a shallow trench of around three to five centimetres, press the prepared section into it and cover with soil, leaving the growing tip of the branch exposed and upright. Anchor the stem in place with a peg, stone or forked stick to maintain soil contact.
Leave the layer undisturbed for six to eight weeks, or over winter if layering in autumn. Once new growth appears from the tip and the stem resists a gentle pull, the layer has rooted. Sever it from the parent plant with sharp secateurs and transplant to its new position.
Division
Division is the most direct method, but it suits only certain hydrangea species. Bigleaf hydrangeas and smooth hydrangeas, which produce dense, multi-stemmed clumps with plentiful outer growth, divide well. Panicle, climbing and mountain hydrangeas are better propagated by cuttings or layering and should not be divided.
There are two approaches. The first is to dig the entire root ball, lift it clear of the ground and use a sharp spade or pruning saw to separate outer sections from the main clump. The second, which is less disruptive to the parent plant, is to cut directly down into the outer edge of the clump with a sharp spade, severing a section of stems and roots and lifting it away without disturbing the centre. Either way, work with the outer perimeter where younger growth is most vigorous and easiest to separate cleanly.
Prepare the new planting site in advance, incorporating compost to improve drainage and organic content. Replant both the divisions and the parent plant as quickly as possible after dividing. Water thoroughly, apply a generous layer of mulch to protect the roots, and in cold climates, add extra protection through the first winter. A correctly done division causes no lasting harm to the original shrub and produces transplants already substantial enough to establish quickly in their new position.
ALSO SEE:
https://www.gardenandhome.co.za/gardening/how-to-grow-champagne-grapes/
Featured Image: Pexels