If you’ve spent any time in the seed-starting rabbit hole, you’ve likely come across soil blocking — a low-waste, surprisingly addictive technique that gardeners are increasingly reaching for over traditional plastic cell trays. But what exactly is it, and is it worth trying?
The basics of soil blocking
Soil blocking is a method of starting seeds in small, compressed cubes of potting mix rather than in plastic trays or individual pots. A specialised tool — called a soil blocker — is pressed firmly into moistened potting media and then released onto a tray, forming neat, self-contained cubes that act as both growing medium and container.
Each block holds one or two seeds and, as they germinate, seedlings develop directly in the soil cube. When it’s time to transplant, the block goes straight into the ground or a larger container — no unpotting, no root disturbance, no plastic waste.
The technique isn’t new. It has roots in Dutch horticulture over the past century and records of similar methods used by the Aztecs as far back as 2,000 years ago in Central America. Today, it’s gaining popularity among home growers and small-scale market gardeners alike.
Why gardeners are making the switch
The appeal of soil blocking comes down to a few key advantages. The first is root health. Because the cube is open-sided, roots naturally air-prune as they reach the edge — they dry out slightly rather than spiralling around a container wall. A Cornell University study on woody plants found that air pruning produces more robust root systems without the circling and kinking that often occurs in plastic pots. For annuals, herbs, vegetables and flowers, the principle translates well: healthier roots mean faster establishment and less transplant shock.
Plants that are notoriously sensitive to root disturbance — poppies, zinnias, larkspur and root vegetables among them — tend to thrive when started in soil blocks for exactly this reason.
Space efficiency is another draw. Blocks can be arranged more tightly than cell trays, meaning more seedlings per square metre under grow lights or on a heat mat. And because there’s no plastic to wash and store at the end of the season, the method is kinder on both your storage cupboard and the environment.
What you’ll need to get started
The equipment list is refreshingly minimal. You’ll need a soil blocker (more on sizing below), a formulated potting mix suitable for blocking, a flat-bottomed tray to hold the blocks, a large mixing container, and a watering can or misting bottle.
The blocking tool itself is the main investment, but a quality tool should last for decades. For most home growers, the two most useful sizes are the two-centimetre mini blocker — which produces 20 small cubes at a time, ideal for tiny seeds with long germination periods — and the five-centimetre large blocker, which makes four blocks per press and suits most seeds you’d start at home.
Mini blocks work well for heat-loving crops like tomatoes, peppers, eggplants and basil, as well as slow germinators like lavender, thyme and anise hyssop. The large blocker covers quick growers and anything you’ll transplant directly into the garden.
Insert systems allow mini plugs to slot neatly into larger blocks as seedlings develop, making the system surprisingly flexible without adding complexity.
Getting the potting mix right
The mix is arguably the most important part of soil blocking. Standard potting soil won’t hold its shape under pressure — you need a blend that compresses into firm, cohesive cubes without crumbling. Look for a recipe that includes a fibrous base (coir or peat), sifted compost, and a mineral component like perlite or greensand for aeration.
A simple peat-free blend uses four parts peat-free potting soil, one and a half parts coconut coir, and half a part greensand. A basic all-purpose mix combines equal parts coir, sifted compost and perlite, with a cup of blood meal added for nitrogen. Whichever recipe you use, mix it with water until it’s moist enough to hold together firmly without dripping.
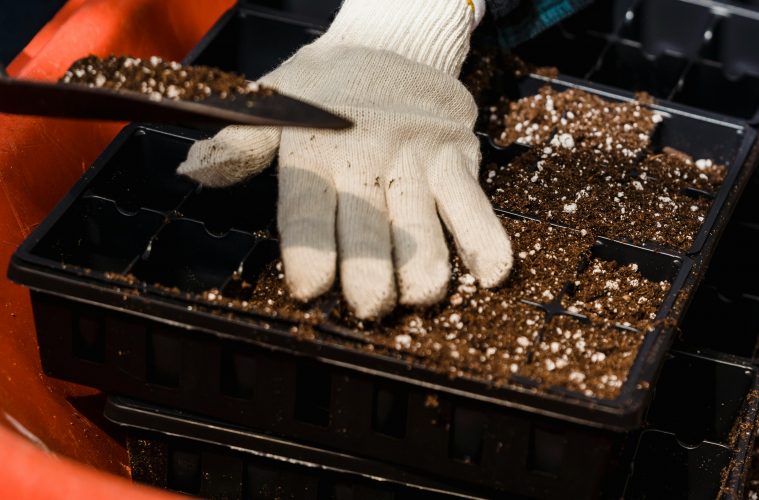
How to make your first blocks
Press the tool firmly into the prepared mix, packing the chambers tightly and filling in the corners by hand before releasing. Scrape excess soil from the base of the blocker and release the cubes onto your tray in a single smooth motion. If blocks crumble or lose their shape, the mix is likely too dry — add a little more water and try again.
Once your blocks are in place, sow one to two seeds per cube, pressing gently for soil contact or covering lightly with vermiculite. Keep the blocks evenly moist by bottom-watering or misting, and provide warmth and bright, indirect light for germination.
The first attempt may be imperfect — a few crumbled corners or lopsided blocks are part of the process. But once you find the right mix of consistency and get a feel for the tool, soil blocking becomes one of the more satisfying rituals of the growing season.
ALSO SEE:
Prep your garden for a new season with these gentle gardening tips
Featured Image: Pexels